Saturday, February 20, 2016

February 2016

So far this winter the weather has been really pleasant compared to the last few years.  Except for a few days of snow it's even been mild.  I'm still banking on a little more snow before I change my house over to Spring but I'm getting pretty itchy to start doing that.


Some years when the weather doesn't cooperate it's hard to go shopping for winter essentials like quilt fabric.  When I'm not off exploring quilt shops everywhere I'm lucky to have a wonderful quilt shop over in the next town.

This is Yankee Cloth.  Nancy is the owner.  She's extremely helpful and full of wonderful ideas!

411 Center Street, Wallingford, CT

 I love this old restored house.  It's gorgeous and even more beautiful inside.  It's meticulous with gleaming hardwood floors and shelf after shelf of endless bolts of beautiful fabric from all of the fabric companies we love.  The shop has lots of books, notions, patterns etc.  One of the best things about this shop is so many of the patterns are finished and displayed.  I get in so much trouble because I want everything I see.  I always go overboard but that's the fun of shopping at a good quilt shop.  You're supposed to want to do that!  It's got all the goodies we love and if you can't find something Nancy orders it for you!


Whenever Sue goes to Yankee she buys Nancy out of these $2 scrap bags.  I always know when she's been there because the bin is almost empty.  I never paid attention to these little bags until...


I realized I could do so many fun scrappy things with this fabric AND it's all coordinated.  And there's a good amount of fabric in them! So now after I've shopped I always go over to the bin and pick out these little bags!


I had a little time to play recently and decided to see exactly what I could make with the fabric from my scrap bags.

I've wanted to make this potholder since I saw it on Freda's Hive blog.  BTW - I love this blog - check it out!

http://fredashive.blogspot.com/2009/01/doll-house-potholder-tutorial.html

I plan to make a whole lot more of these!!


I came across this pattern on Pinterest and loved it so much I decided to make this mug rug out of another bag of scraps.


This is My personal mug rug!!


 Then I showed them to Kristen and Susan and asked if they might like one and of course they do.  Then I decided to make a few for presents/hostess gifts etc. and now I've got a little stash.  They're so easy and fun to make.  


Here's the pattern.  This is a neat blog too!  At first I was going to follow the directions step by step but I knew if I put a lot of time and effort into making this mug rug I wouldn't want to use it.  Instead I decided to just applique the coffee cup onto my scrap fabric.  I think they came out just as pretty and the best part was I was able to finish them in one sitting.  All I have to do now is sew the binding on a couple of them.  I can do this mindlessly while I'm watching Dr. Phil.

 http://grandmotherschoice.blogspot.com/2013/04/34-coffee-cup-not-my-job-description.html

I love the two-sided Lite EZ-Steam II fusible web.  I always use it when I applique and then just quickly go over the design with a button hole embroidery stitch. 


We have a new member of the family!!  Sue bought a long arm sewing machine and we named her LuLu!!  At first LuLu had to get used to living in Sue's beautiful quilt room.  Once she got more comfortable she got less finicky and Sue learned what she likes and doesn't like.  I always ask Sue if she pinches herself when she wakes up every morning knowing that beautiful machine is just sitting there waiting for her!


I never finish my blog without a delicious recipe and this one is fantastic!  I had a package of Neufchatel cream cheese in the fridge which I had to use and some homemade strawberry jam I save for occasions such as this.  I decided to substitute the raspberry for strawberry and it was out of this world!!  With a cup of coffee or a big glass of cold milk it's a memorable dessert!


Raspberry Cream Cheese Coffee Cake

from allrecipes.com

Directions


  • Prep
  • Cook
  • Ready In
  1. Preheat oven to 350 degrees F (175 degrees C). Grease and flour a 9-inch spring-form pan.
  2. Combine flour, 3/4 cup sugar, and butter in a food processor; pulse until mixture resembles coarse crumbs. Remove 1 cup of mixture from food processor and set aside. To remaining mixture in processor add baking soda, baking powder, salt, sour cream, almond extract, and 1 egg; process until batter is just combined and smooth. Spread batter evenly into bottom and 2 inches up sides of prepared pan.
  3. Beat cream cheese, 1/4 cup sugar, and 1 egg together in a bowl until smooth; pour into batter-lined pan and spread evenly. Spread raspberry preserves carefully over cheese filling.
  4. Stir reserved crumb mixture and sliced almonds together in a small bowl; sprinkle over the layer of raspberry preserves.
  5. Bake in preheated oven until filling is set and crust is deep golden brown, 45 to 55 minutes. Cool 15 minutes before removing side of pan. Chill completely before serving, about 1 hour.

I really love to quilt but my first love is and always will be dolls.  So every once in a while I HAVE to make a doll.  Unfortunately right now with my busy life I no longer have the time or patience to sculpt dolls but just like a good recipe I can always whip up a quick doll.  Keeping with my scrap mentality lately I made this mouse from the left-over mitten candle mat I made a few months ago.


There's never enough time to play but it sure feels good when you can fit it in!!

Thanks for visiting and see you in March!!

Saturday, January 23, 2016

HAPPY NEW YEAR 2016!


JANUARY 2016

HAPPY NEW YEAR!

I can't remember getting snow so late in the season. As much as I wanted snow for Christmas it was a nice change to be able to plan all of our holiday festivities without worrying about the weather.

But it all had to come to an end and here we are on a weekend watching the snow fall.


Over the Christmas break we were in Lexington, MA.  Lexington is one of those wonderful little towns in MA that reminds me of Peyton Place.   


They never lose their charm because you just can't make them modern.  They still belong to the old New England tradition of brick and white pillars.


Chris took us to a really good restaurant in Lexington called il Casale Cucina Campana & Bar on Massachusetts Avenue.  Susan got a cocktail called cranberry cider.  It was so delicious I asked the bartender how they infused the cranberries in the rum and made the drink.


Here's the recipe!  We started by buying a bag of cranberries and a bottle of vanilla beans (in the baking aisle of the grocery store).  I used half the bag of cranberries and 2 vanilla beans.  After the cranberries are washed put them in a mason jar.  Then open the vanilla beans and scrape out the inside and then put that and the pods in the mason jar with the cranberries.  Pour the rum over the cranberries and vanilla.  I used Captain Morgan Spiced Rum because I thought it would be delicious.  Let that sit on your counter for 4 or 5 days or until the rum takes on the red color of the berries.
When you're ready to make the drinks you can use either hard apple cider which will make it a little stronger or sparkling cider.  We tried it both ways and couldn't really tell the difference. Strain the cranberries and vanilla and pour the rum in a pitcher and add the cider.  Use your judgment with the amount of cider to use by tasting as you're adding.  Then add a pinch of cinnamon and a squeeze of lemon and stir!


Reserve the cranberries and use one or two for a garnish.  Add ice and drink up!!  This is a wonderful holiday drink.  I will be serving this many times next year around the holidays when cranberries are plentiful.


So we served this drink on New Year's Day and decided to use the rum infused cranberries in the Cranberry Glaced Ham recipe we were planning to make.


Here's the recipe.  It's delicious!


SimplyRecipes - Cranberry Glazed Ham Recipe

Ingredients

Glaze:
  • 1/2 of a 14-ounce can of jellied cranberry sauce
  • 1/4 cup orange juice
  • 2 strips of orange zest
  • 2 to 3 Tbsp brown sugar
  • 1 Tbsp whole grain mustard

Ham:
  • 1/2 spiral-cut ham (about 9 pounds, plus or minus), bone-in, natural juices or no added water

Method

1 Let ham sit at room temp: Let the ham sit at room temp for a couple of hours before cooking. This will help the ham heat more evenly in the oven with less risk of the outside edges drying out.
2 Heat the ham: Wrap the ham tightly in aluminum foil, place in a roasting pan, and heat in a 275°F oven for 2 to 2 1/2 hours (depending on the size of the ham, could be less or more time), until the internal temperature is 100°F. (It's already cooked, you're just heating it.)
3 Make the glaze: Place the jellied cranberry sauce in a small saucepan on low heat. Whisk in the orange juice and brown sugar until the brown sugar is dissolved. Add the strips of orange zest. Heat until bubbly and whisk until smooth. Then remove from heat, take out the orange strips, and stir in the mustard.*
4 Glaze the ham: When the ham is ready, remove from oven. Open up the foil and paint the ham with half of the glaze. Keep the ham uncovered and return to the oven, bake at 425°F for 10 minutes.

5 Glaze again and broil: Remove from oven and baste with the remaining glaze. Return to the oven on the lowest rack, and broil for 5 to 10 minutes (at least 6 inches away from the heating element) until the glaze is lightly browned and caramelized.

*Add the rum infused cranberries to number 3 in the Method section.  


This glaze/gravy was out of this world with the addition of the cranberries.


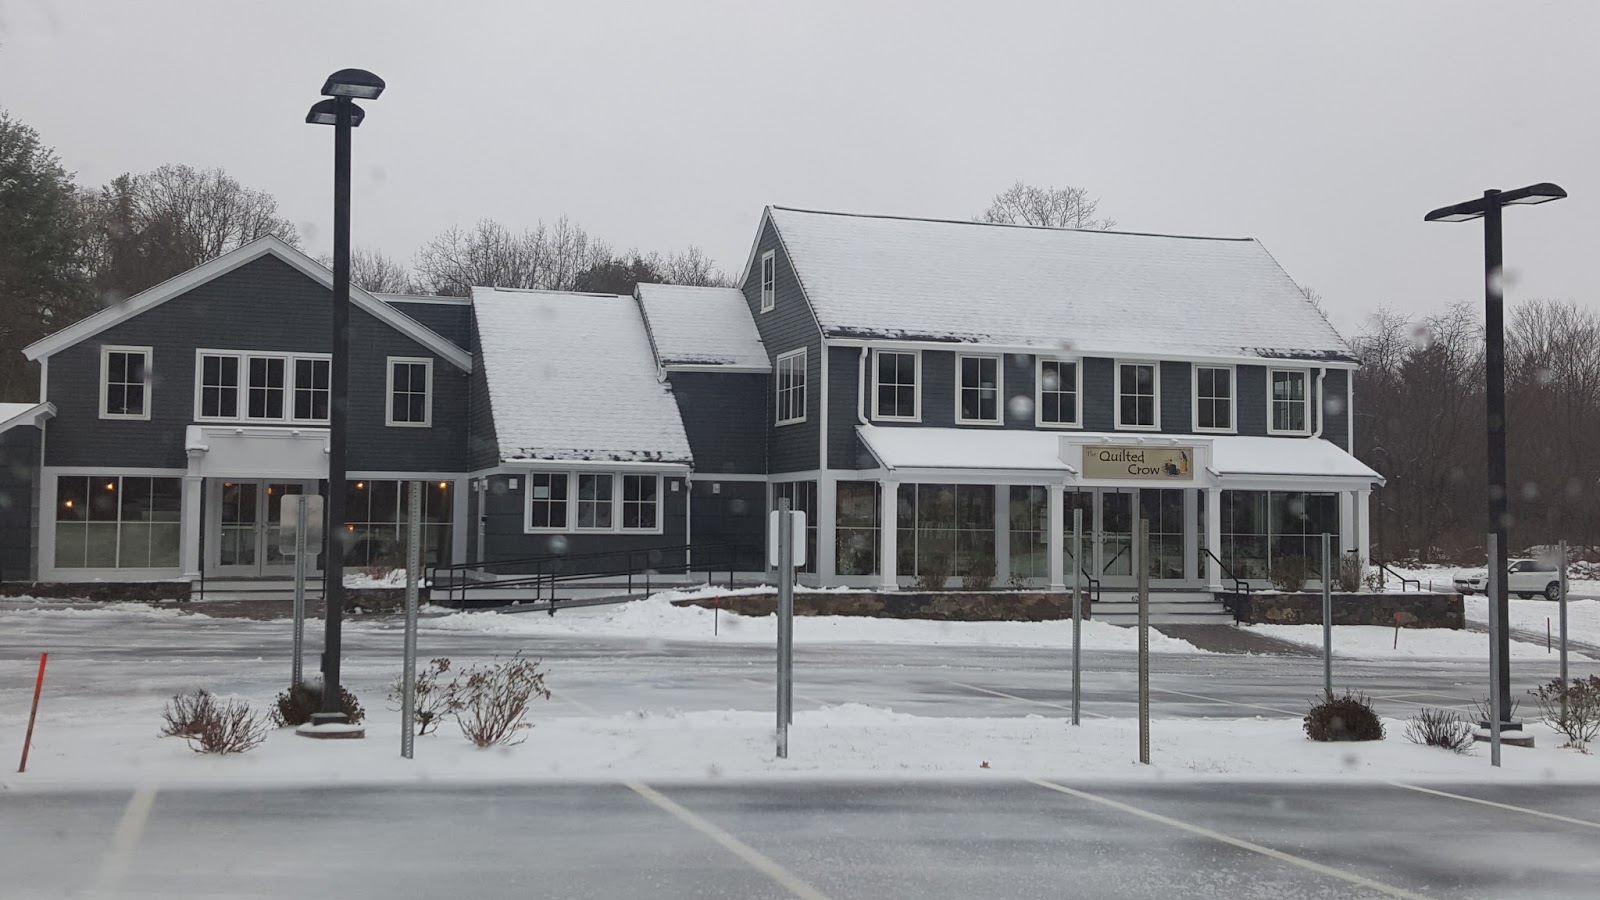
I was looking forward to visiting The Quilted Crow this winter because it moved.  They are one exit closer to us now in Bolton, MA.


I loved the old house they were in before but this space is so much bigger and a lot more organized.  This shop has EVERYTHING!!  There's a shop hop in April that our quilt group needs to talk about because I'd love to get everyone to take a trip up there.  I bought some amazing Japanese fabric that I'll share next month.


When I got home my wallet was lighter BUT I was full of inspiration and decided to get busy on some of the many projects that are calling my name.  This is a small little quilt kit I picked up there last year at this time.  I finally made it and I love it!


I love felt candle mats and when I saw this one at The Quilted Crow a few weeks ago it called my name.  While I was watching TV I made it.


Everything Christmas is put away but everything winter is still up so I'm happy I finally finished something in time to use it the same year!


My family knows I LOVE Dowton Abbey so they're always on the lookout for something I would like.  This Christmas this was my Dowton "fix".


Over Christmas break I started my Downton Abbey quilt.

Downton Abbey:

These are some of the blocks I made.  The quilt calls for 50 so I suspect It'll take me until the movie comes out to finish them.


Over the holidays and when it snows we make homemade pizza.  Homemade pizza in our house is so special we would eat it every day of the week for life if we could.  It's just that good.

These are some of the pizzas we made one night.  It took all night and few Smashed Pumpkins to make them all but they were to die for and even better left over the next day.


I have to share my recipe with you because it's so easy.  If we didn't make so many it wouldn't be such a "job" but when everyone has a favorite one the whole production just gets out of hand.  It's kinda like when you try and narrow down your Christmas cookie list but end up making them all every year anyway.


Fleischmann's Yeast Food Processor RapidRise Pizza Dough

3              cups flour
1              package Fleischmann's RapidRise Yeast
3/4           teaspoon salt
2              tablespoons olive oil
3/4 to 1    cup warm water (105-115 degrees)

With metal blade in place, combine flour, undissolved yeast and salt in processor bowl  Process 5-10 seconds to combine.  Pour olive oil through feed tube.  Begin processing; gradually pour water through feed tube just until ball forms (all water may not be needed).  Continue processing for 60 seconds to knead dough.  Carefully remove dough from processing bowl.  Cover; let rest on lightly floured surface 10 minutes  Shape, top and bake as directed.

Thanks for visiting and if the cold and snow get too much for you just do as I'm going to do-


See you in February!!

Tuesday, December 15, 2015

Merry Christmas

MERRY CHRISTMAS 2015

One week and a few days before Christmas and I'm in a mad rush.  The years when Thanksgiving falls on the last Thursday in December are getting harder and harder to manage.  Adding to that I'm not sure if I'm glad or sad the temperature outside is so warm.  I'm kind of looking forward to some cold weather so I can wear my new winter coat and scarf and make hot cocoa with marshmallows!

But no matter what, the decorating has to get done.


Over Thanksgiving we visited the Norman Rockwell Museum in Stockbridge, MA.  It was a fun, memorable day trip.  I was told to go there during the first weekend in December when the Christmas tree is lit and the holiday festivities begin. It was really crowded there when we visited as it was, so visiting the weekend before worked out well for us!


When we arrived, we caught a short library talk and tour of the museum.  It was interesting to find out that most of the people in the paintings lived in town and posed for Rockwell while he lived there.  The very famous work below is of the actual town of Stockbridge.  If you look down the street, you can still see the shops most of which still have the same names.  On the first weekend of festivities, a part of that strip is re-created to look exactly like the painting.  It must look magnificent especially if there's snow on the ground.


When I told my friend Mary Ellen from quilt group that we were going she suggested lunching at The Red Lion Inn.  It was wonderful!


After lunch, we did some shopping and took in the beautiful homes on the main street.  This is a Bed and Breakfast.


OK, back home Santa is waiting to pop down the chimney!


This is the only project I made this Christmas.  I'm sad to say life got in the way AGAIN!  It's a felt candle mat from a book I bought at Camille's store in Barrington, NH in the Fall.


...but I'm using it as a Christmas tree mat!


This dolly got a bit of a make-over for Christmas. 


 Do these two pixies look familiar?  Yes, their Maileg!  I love these dolls.  This pair was an early Christmas present to myself.


YES I got a little carried away and bought this lovely trio too!!  I haven't bought a doll in years so these beautiful treasures are a big treat for me!


So true!!


But we all hear it over and over - IN MODERATION!  Not sure if I've ever been able to moderate Christmas!  I'm always hopeful but always fall into the same old pattern of excess!


I was so happy when Jessi gave us this peppermint bark candy!  Little did we know she made it in her dorm!!  So no excuses for those of us who have kitchens!  Best of all she saw this recipe on one of my Facebook posts!  We'll be making this too Jessi because we ate all of yours already!!  It was so delicious!!


From: 12 Tomatoes

EASY PEPPERMINT BARK RECIPE

(makes one 9×13 pan of bark)
Ingredients
  • 1 bag chocolate chips
  • 1 bag white chocolate chips
  • 24 mini candy canes
Directions
  1. Put the candy canes in a resealable plastic bag. Use a rolling pin or tenderizing mallet to crush the candy canes. Don’t use a blender or food processor, because we want those nice uneven bits that look great right on top.
  2. Line a 9″x13″ pan with parchment paper, including the sides, leaving enough extra so you will be able to lift the peppermint bark right out of the pan.
  3. Pour the chocolate chips in a microwave-safe bowl, and microwave for 30-second increments (stirring the chips between each microwave session) until the chocolate has melted, and the mixture is smooth.
  4. Spread the chocolate evenly into the lined pan.
  5. Place the pan into the freezer for 20 minutes.
  6. Melt the white chocolate in the microwave just as you did with the previous chocolate chips. If the white chocolate chips to not melt smooth, stir in 2 tablespoons of shortening.
  7. While the white chocolate is still smooth, stir in half the crushed candy canes into the mixture.
  8. Allow the white chocolate to cool for about a minute, then remove the pan from the freezer and spread the white chocolate mixture on top of the chocolate layer, making it as smooth as possible.
  9. Top with remaining crushed candy canes, and press them in the the back of a spatula.
  10. Return the pan to the freezer for another 20 minutes.
  11. To serve, remove the parchment paper from the pan and break into pieces (or cut with a butter knife).
  12. Enjoy!

Merry Christmas and Happy New Year

 Thanks so much for visiting and always letting me know you're still there!


See you in 2016!!